How to digitise photographic materials yourself
Digitising photographic material is a labour-intensive and costly task that you ideally only want to do once. The publication Digitising photographic materials by Flemish heritage societies (in Dutch) offers a step-by-step guide to digitising your photos, slides and other 2D visual materials in the highest possible quality. It explains why it’s important to digitise photographic material in high quality, what hardware and software you need, and how best to proceed.
Key points
Digitisation is a labour-intensive process that must be carried out carefully to avoid repetition. A good digital copy is a faithful representation of the original material, meaning that colour, brightness and contrast are accurately reproduced. This requires specific equipment and software, as well as durable file formats like uncompressed TIFF.
A quality digital copy should:
- Display accurate colours without colour cast;
- Have appropriate brightness and uniformity;
- Offer high resolution for detail retention;
- Show correct contrast to preserve all colour nuances of the original.
What do you need?
Equipment
- Camera: a system camera or digital SLR with live view for easy operation.
- Lens: preferably a macro lens with a fixed focal length (60-70 mm).
- Lighting:
- for opaque materials: two flash lamps with softboxes for uniform lighting, e.g. available for loan via the Uitleendienst Erfgoed (‘Heritage Loan Service’).
- for transparent materials: a lightbox.
- Other: laptop with relevant software, flash meter, spirit level, tape measure and black paper.
Software
- Adobe Lightroom Classic
- Negativelabpro or Grain2Pixel: for processing colour negatives
- Optional: Adobe Photoshop or the free GIMP for further editing
How to get started?
Preparation
- Choose a room without large light differences and avoid stray light. Darken the room if possible and ensure a safe, stable working environment.
- Set your camera as follows:
- File format: RAW without compression
- ISO value: as low as possible, preferably 50 or 100
- White balance: set to flash light or 5600K
- Colour space: AdobeRGB Adobe RGB
- Focusing: manual
- Shutter speed: 1/125 seconds or shorter
- Aperture: f/8 for optimal sharpness and depth
- Before starting the digitisation, it’s best to sort the photographic materials by type.
-
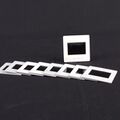 Transparent materials: slides. Photo: Wikimedia Commons
 -
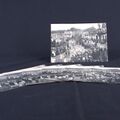 Opaque materials such as photo prints and postcards. Photo: Wikimedia Commons
 -
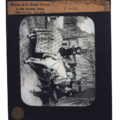 Transparent materials: slides. Photo: Bart G. Moens, CC BY-NC-SA
 -
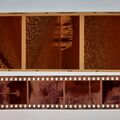 Transparent materials: colour negatives. Photo: Hilke Arijs, CC BY-NC-SA
 -
 Transparent materials: Black-and-white negatives. Photo: Hilke Arijs, CC BY-NC-SA


Digitising photo prints, postcards, cartes de visite … (opaque materials)
Use a vertical or horizontal setup depending on the size of the material. Place the flash lamps at a 45-degree angle to ensure even lighting. Check the light distribution with a flash meter at multiple points to ensure consistent lighting.

Setup of the repro stand with flash lamps at a 45-degree angle. Image: Hilke Arijs, CC BY-NC-SA.
Digitising slides, negatives, glass plates … (transparent materials)
Use a lightbox with adjustable colour temperature for transparent materials. For materials with edge information, such as lantern slides, combine the lightbox with two flash lamps and a target to ensure colour accuracy.
Sustainable Preservation
The master file is the base file from which you create all other versions. It’s essentially the source you will repeatedly return to.
This is the file you place in a digital archive. It contains the highest quality and all necessary information (about the colour space, etc.) to read the image correctly. It’s also a sustainable file format – one that can be opened with various software programs, so you’re not tied to one company’s software, and it’s uncompressed. In short: always use the stable TIFF 6.0 format for photo files. Save colour images as 16 bit per channel. For black-and-white images, 8 bit is sufficient.
Store the master files in at least two locations and regularly replace the storage medium (an internal or external hard drive). For example, store your files both locally – on a hard drive or an external drive – and in the cloud. Use checksums to regularly check (e.g. once a year) the integrity of the files. This ensures you check whether the ones and zeros that make up the file are still the same.
Learn more
The video and guide to Digitalising Photographic Materials (in Dutch) guide you through the entire process. These tools have been developed by Flemish heritage societies.
Author: Hilke Arijs (Erfgoedcel Denderland). This text was taken from the FARO heritage guide (in Dutch) and is available under the CC BY-NC-SA licence.